Thursday, August 6, 2015

Sarah's summer tacos

Warning.  THESE ARE INSANELY GOOD. 

_DSC7930.jpg

Ingredients:  
1 pound salmon, skinned and cut into cubes  (I used shrimp
1 rounded T cumin
1 rounded t chili powder
2 T+ olive oil for sautéing 
1 medium yellow onion, chopped  (I used white onion
1-2 limes, quartered
1- 8 ounce can chopped tomatoes, drained
1 can chopped green chilies, drained
1/2 bunch cilantro, chopped
1 bunch green onions, chopped
1-1/2 T chicken soup base

Toppings:
Avocado 
Chopped lettuce 
Sour cream 

Directions: 
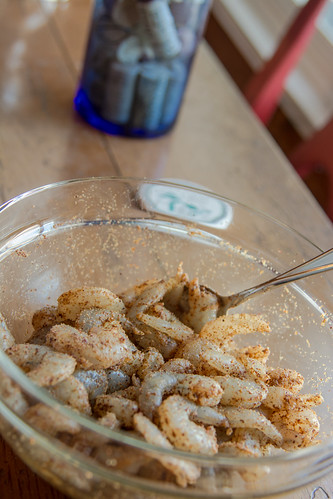
Toss cubed salmon in cumin and chili powder. Set aside for at least an hour.  (I seasoned for 4 hours
Chop onions, cilantro, and chilies (I had chopped chilis
Heat oil over medium heat and cook onion until it softens.
Turn heat up to medium high. Add salmon to skillet. Lightly sear salmon cubes for about 2-3 minutes, turning gently (don't break the salmon into pieces!). (The shrimp took longer
Return heat setting to medium. Add canned tomatoes and chilies, cilantro, green onions, and soup base. Gently incorporate and heat through. 


Serve:
Squeeze quartered limes over the salmon mixture.
Serve with fresh warm flour tortillas, sour cream, sliced avocado, and chopped romaine lettuce.

Cooks notes:
I seasoned the shrimp all afternoon.  I like a little kick so I used more cumin and chili powder. 
I didn't completely drain the tomatoes and chilis. I like a little sauce in my tacos.  
I skipped the chopped lettuce. Why take up room with lettuce when you can have more shrimp? 
I added a can of chopped black olives.  I could also see adding corn.  

You could easily make this with chicken, any kind of fish, and even steak.  So delicious. 

Saturday, April 4, 2015

Garlic-Skewered Shrimp

This recipe has been with us for years.  Like in long-before-the-internets years.  From a BOOK. When we had recipe books.  This recipe book has been used and abused for years, suffering mightily through the great coffee catastrophe of 2004 but managed to survive with a few scars.

This recipe is a staple in our home.

  • 12-16 whole cloves garlic, peeled (for skewers)
  • 3 large cloves of garlic, minced
  • 2 lb large or jumbo shrimp
  • 1/3 cup olive oil
  • 1/4 cup tomato sauce (we use more - like 1/2 cup,  especially if we use more shrimp)
  • 2 T red wine vinegar
  • 2 T chopped fresh basil (the recipe says you can use 1 1/2 t dry but we recommend the fresh. We can definitely tell a difference)
  • 1/2 t salt (we skip this)
  • 1/2 t cayenne pepper (we use way more - like 2 T. We LOVE the kick this gives to the shrimp)
  • 8-10 bamboo skewers

Peel and devein the shrimp.

In a large bowl, stir together the oil, tomato sauce, vinegar, basil, minced garlic, salt, and cayenne pepper.  Add the shrimp and toss to coat evenly.  Cover and refrigerate for about 30-60 minutes, tossing once or twice.

Bring a small pot of water to a boil.  When the water is a rolling boil, place the peeled whole garlic cloves into the them into boiling water and cook for about about 3 minutes.  Immediately pour the water and garlic cloves through a  colander.  Rinse the garlic on cold water to stop them from cooking.  After the garlic cloves are cool, drain them and set aside.

About an hour before you are going to grill the shrimp, place the bamboo skewers into a shallow baking dish and cover with water.  Allow the bamboo skewers to soak for an hour or so.  By soaking the skewers, you will keep them from burning when you grill the shrimp.

When ready to grill, skewer the shrimp, interspersing the blanched garlic on the skewers.  Discard the marinade.  Grill shrimp10-12 minutes, turning once.  When the shrimp is done, they will have a bright pink color.  Remove the skewers from the grill and serve immediately.


Cook's Notes:

  1. We let the shrimp marinate for a few hours.
  2. We put the marinating shrimp in a large, plastic bag.  Makes tossing once or twice really easy.
  3. We buy really big garlic so the cloves are easy to skewer.
  4. Seriously use fresh basil. Makes a difference.
  5. Adjust the amount of cayenne pepper for personal taste. I don't mind crying a little with some spices but food shouldn't hurt.

P.S.  This recipe is courtesy of Williams-Sonoma Kitchen Library book, "Grilling."  We love this little book so much that we have given it as gifts for birthdays and holidays. I looked for this book online and it appears that the title of Grilling has gone through many updates and iterations.  On Amazon, it has the right cover picture but the table of contents no longer have this recipe, which in my opinion, is a shame.


Sunday, March 8, 2015

Sinbad's Chili

For anybody who grew up on the east side of Detroit, or who might have been fortunate enough to have been a boater (or be a friend of somebody who was a boater), there is a restaurant located on the Detroit River called Sinbad's Restaurant and Marina.  Sinbad's has been in business since 1949, serving boaters and landlubbers alike.  The restaurant has a commanding view of the Detroit River and Belle Isle.  Sinbad's has great food, and serves a great version of chili.  Decades ago, the Detroit Free Press would publish recipes from local restaurants.  One day, they published the recipe for Sinbad's Chili.  Here is the recipe once again:

Ingredients:
- 1 1/2lbs - 2lbs ground beef or ground turkey
- 1 large can (28 oz) of tomatoes (I used diced tomatoes)
- 1 can (14-15 oz ) tomato sauce
- 1 cup (8 oz) water or beer
- 1 medium onion, coarsely chopped
- 10-12 oz tomato juice (I used two 5.5 oz cans of V-8 Juice)
- 1 tablespoon crushed red pepper
- 1/4 cup chili powder
- 1 can (6 oz) tomato paste
- Salt and Pepper to taste
- 1 heaping teaspoon cumin (my addition)
- 1 can (15.5 oz) kidney beans, drained and rinsed (optional)

Directions:
Combine the large can of tomatoes, water, tomato sauce, salt, pepper and crushed red pepper in a large pot and bring to a boil.  Once boiling, crumble in the ground meat.  Add the chili power, onions, tomato paste, tomato juice, cumin (if desired), and kidney beans (if desired).  Lower heat and simmer on low or medium low for one hour.


Cook's Notes:
You can allow the chili to simmer for hours.  The original recipe did not have cumin.  I added it a few years after I read that cumin is used in a lot of chili recipes.  I think that it really added a nice taste to the chili.  What I really like about this recipe is how easy it is to make.  Also, you can add shredded cheese or sour cream to it, if you like those ingredients.  This chili is great for days after you make it.  Enjoy!


Sunday, February 15, 2015

Beef Tenderloin Roast in a Ruby Port Reduction

Over the course of the past few months, I have gone back to the east side of the state to spend some time with my Dad.  Conveniently, there is a wonderful butcher shop called The Village Market.  It is a magical place to shop if you are a cook.

The Market sells trimmed and tied beef tenderloins that will go on sale for $6.99-$7.99/lb.  When I was back in Grosse Pointe a few weeks ago, I picked up three of these beauties.  When I got back to GR, I cut the tenderloins in half, sealed them and put them into our chest freezer.  The past few weekends I have been experimenting with new recipes.  For Valentine's Day, I decided to try a recipe that was a mix of a beef tenderloin and a filet mignon recipe I have made in the past.  Here are the details:

Ingredients:
- 1 beef tenderloin, 1.5-2lbs (this is half of a traditional beef tenderloin)
- 1 cup (8 oz.) ruby port
- 1 cup (8 oz.) dry white wine
- 3 tablespoons butter
- 2 tablespoons balsamic vinegar
- 2 oz. drained capers (about half a bottle of capers)
- olive oil


Directions:

About an hour before you are going to put the tenderloin into the oven, take it out of the refrigerator and allow it to stand at room temperature.  

While the beef is warming up, our the port and the white wine into a saucepan.  Reduce the mixture until you have between 2/3 and 3/4 of a cup of liquid.  Once the wine mixture is reduced, set aside for use later.

Preheat your oven to 450F.  Place the beef tenderloin into a cast iron skillet and rub the beef with olive oil.  Add salt and pepper to taste.  Once the oven has reached 450F, place the roast into the oven and cook to desired doneness.  I like to take the roast out when the internal temperature has risen to 125F (medium rare).

When the roast is done, remove it from the oven and place it on a cutting board.  Lightly cover the roast in aluminum foil and allow it to rest for 10 minutes.

Add the balsamic vinegar to the reduced wine.  Pour this mixture into the iron skillet and bring to a boil, scraping up any browned bits.  Boil the mixture until it has a sauce consistency, 2-3 minutes.  Reduce the heat to low and add the butter.  Whisk the mixture until the butter is melted. Once the butter is melted, add the capers.  Just before slicing the beef, pour any accumulated juices from the roast into the iron skillet.

Slice the beef into 1 inch thick slices and serve immediately.  Gently spoon the sauce over the beef and enjoy.

Cook's Notes:

I have made a ruby port reduction before, but it was for a filet mignon recipe.  I thought that I could make this reduction and spoon it over the beef.  I was not disappointed.  The results were amazing.  

As for the reduction, the original recipe I had wrote that the wine mixture would be reduced to 2/3 of a cup in "8 minutes."  In reality, it takes between 20-25 minutes.  At the 15 minute mark of reducing, I started to pour the reduction into a Pyrex measuring cup to see how much more I needed to reduce the wine.  

As for knowing the temperature of the tenderloin, your kitchen is not complete without a remote sensing thermometer.  You can pick one up at Bed Bath and Beyond, or just about any specialty kitchen store.  Once you have one, you will wonder how you cooked a roast in the past.  A link to a description of the thermometer I use can be found here.  I swear by this gadget.


Sunday, February 1, 2015

Beef Tenderloin with Capers in a Red Wine Reduction

I had a jar of capers that was about half full.  I thought I should out them to good use and I tried this recipe.

Ingredients:
- 1 beef tenderloin, 2-3 lbs
- 2 T olive oil
- 2 t fresh chopped thyme
- salt and pepper to taste
- 1 cup full bodied red wine (Syrah or Cabernet)
- 2 T capers, drained
- 3 T unsalted butter

Directions:
Let the beef tenderloin stand at room temperature for about an hour before cooking.

Preheat an oven to 450F.

Rub the tenderloin all over with the olive oil.  Next, rub the tenderloin with thyme, salt and pepper.

Place the tenderloin into a cast iron skillet (or a roasting pan).  Roast the tenderloin until the internal temperature of the thickest part of the meat registers 125F for medium rare, or 130F for medium.  Remove the roast from the oven, and place the roast on a cutting board and loosely cover it with aluminum foil.  Allow the roast to rest for 10 minutes.

While the roast is resting, place the cast iron skillet on stove at medium heat.  Add a little of the wine to deglaze the pan.  Slowly add more of the wine in small batches.  Using a wooden spoon, stir the wine and reduce it my nearly half (this will take 6-7 minutes).  Once the wine is reduced, add the capers and butter.  Mix the sauce for another minute.

Pour any drippings from the cutting board into the reduction and mix.  Slice the roast and serve immediately.  Spoon the reduction over the meat and enjoy.

Cook's Notes:  This is an incredibly easy recipe to make.  I removed the roast as soon as the internal temperature eas 126F.  If you do not have a remote sensing thermometer, I strongly recommend you get one at a kitchen store.  You will wonder how you ever cooked a roast before.  The wine I used for the reduction was a bottle of 2012 Blackstone Cabernet Sauvignon.

Our dinner guest brought a bottle of wine called E.  It is a Spanish wine made by David Phinney.  Here is a review of the wine.  It was a perfect compliment to the beef tenderloin.

Saturday, January 17, 2015

Simple Greek/House Salad Dressing

Dee and I sometimes go on a "Greek Salad" run for our evening meals.  A few years ago, Dee found this recipe and we have used it ever since.  Very simple to make and it tastes great.

Ingredients:
- 1/2 cup olive oil
- 1 1/4 teaspoons garlic powder
- 1 1/4 teaspoons dried oregano
- 1 1/4 teaspoons dried basil
- 1 teaspoon ground black pepper
- 1 teaspoon salt
- 1 teaspoon onion powder
- 1 teaspoon Dijon mustard
- 2/3 cup red wine vinegar

Directions:
In a Mason jar, mix together the olive oil, garlic powder, oregano, basil, pepper, salt, onion powder, and Dijon mustard.  Pour in the vinegar, and mix vigorously until well blended.  Store the dressing in the refrigerator for up to two weeks.

Cook's Notes:  
This dressing goes well with just about anything.  You can pour it over greeds or sliced tomatoes.


Friday, January 16, 2015

Italian Dressing Mix

If you look at the ingredients on most store bought salad dressings, you see a lot of stuff you probably do not want to ingest.  A couple of years ago we started making our own salad dressings and we have never looked back.  This is a favorite Italian dressing recipe:

Ingredients:
- 1 tablespoon garlic salt
- 1 tablespoon onion powder
- 1 tablespoon white sugar
- 2 tablespoons dried oregano
- 1 tablespoon ground black pepper
- 1 tablespoon dried parsley
- 1 tablespoon salt
- 1 teaspoon dried basil
- 1/4 teaspoon dried thyme
- 1/4 teaspoon celery salt

Directions:
1.  In a bowl, mix all the ingredients.  Store the dry mix in a tightly sealed container until ready to use
2.  To prepare the dressing, mix 2 tablespoons of the dry mix with 2/3 canola oil, 1/4 cup white vinegar, and 2 tablespoons of water.
2.  Store the dressing in a tightly sealed container in the refrigerator for up to two weeks.

Cook's Notes:
Another easy but delicious salad dressing.  The original recipe called for 2 tablespoons salt.  I found that much salt made the dressing, well, salty.  We store the dry mix and the prepared dressing in Mason jars.


Caesar Vinaigrette

I stumbled across this recipe a few years ago and on a whim I made it.  I have to say that it is one of my favorite salad dressings.  I am not a big fan of anchovies, but the key ingredient in this vinaigrette is the anchovy paste.  

Ingredients:
- 2-3 cloves garlic, pressed through a garlic press (or minced)
- 1 tablespoon Dijon mustard
- 1 teaspoon anchovy paste
- 1/4 teaspoon Worcestershire sauce
- 1/2 teaspoon Tabasco sauce (or any red hot sauce)
- 3 tablespoons lemon juice
- 1/2 cup extra virgin olive oil

Directions:
1.  Place the garlic, mustard, anchovy paste, Worcestershire sauce, and Tabasco sauce into a bowl, and using a fork, mash them into a paste.
2.  Add the lemon juice and stir to combine.  Whisking constantly, slowly add the olive oil in a steady stream.  Continue to whisk until the dressing thickens.  The vinaigrette can be refrigerated, covered, for up to 1 week.  Let the dressing return to room temperature before using.

Yield:  About 2/3 cup

Cook's Notes:
I tend to add more garlic than the recipe lists.  We like garlic.  I store the vinaigrette in a Ball or Mason jar, and it is important that you take the dressing out of the fridge 30-45 minutes before you use it.  Finally, the anchovy paste is the key ingredient.  You can add more or less of the paste, depending on your tastes, to the dressing.


Sunday, January 11, 2015

Round steak

I have no pictures. Perhaps when I serve and then I will add some. This is insanely easy and so delicious. It is the perfect recipe for a lazy Sunday.

1 round steak
1T Mickey and T's All-American seasoning
1 can diced tomatoes (I like the garlic and onions but you could use any kind)

Place the round steak in the crockpot. Sprinkle with Mickey & T's seasoning. Cover with one can diced tomatoes.

This time, I had some aging rosemary that I needed to use so I threw that in too. Serve with your favorite sides.

Delicious!